Gitlab with Podman
Gitlab with Podman &
The ultimate goal for my previous post about Dagger was to demonstrate the combination of it with Gitlab and Podman, but unfortunately I ran into so many different problems I made the decision to break it apart.
This is second part of a small series and explains how to set up Gitlab with Podman-in-Podman and various pitfalls along the way.
|
If you are looking for the first part just follow this link over here: Building with Dagger. |
Preparations &
The first step in order to start Gitlab is to provide an SSL cert, but to make this a lot more interesting we rely on a self-signed one:
$ openssl req -newkey rsa:4096 -x509 -sha512 -days 365 -nodes \
    -out gitlab.crt -keyout gitlab.key \
    -addext "subjectAltName=DNS:gitlab" \ (1)
-subj "/C=DE/ST=DE/L=DE/O=unexist.dev/OU=showcase/CN=gitlab" (2)| 1 | This line is essential, otherwise Gitlab won’t accept this cert |
| 2 | We are going to use gitlab for the hostname, so make sure to add it to your hosts file |
Next up is the actual config of Gitlab.
There is aplenty that can actually be configured beforehand, especially in memory constrained environments it is beneficial to disable services like Prometheus, but here we trust in convention over configuration and just include only the bare minimum to run Gitlab:
external_url 'https://gitlab:10443/'
registry_external_url 'https://gitlab:4567' (1)

registry_nginx['enable'] = true
registry_nginx['listen_port'] = 4567 (2)

nginx['ssl_certificate'] = "/etc/gitlab/ssl/gitlab.crt"
nginx['ssl_certificate_key'] = "/etc/gitlab/ssl/gitlab.key"
nginx['listen_port'] = 10443 (3)| 1 | Setting the ports here causes problems elsewhere, so better also set the ports in <2> and <3> |
| 2 | My initial idea was to use the registry as a cache, but more to that later |
| 3 | Nginx usually picks the port from external_url, which is not what we want to do |
Like Kubernetes, Podman allows to group or rather encapsulate containers in pods and also to convert them afterward, so let us quickly create one:
$ podman pod create -n showcase --network bridge  \
        -p 10022:22 `# Gitlab ssh` \
        -p 10443:10443 `# Gitlab web` \
        -p 4567:4567 `# Gitlab registry`
e91d11fdeb168c5713c9f48a50ab736db59d88ae7e39b807371923dcf4f26199
This can be done with the make target pd-pod-create.
|
Starting Gitlab &
Once everything is in place we can fire up Gitlab:
$ podman run -dit --name gitlab --pod=gitlab \
    --memory=4096m --cpus=4 \
    -v ./gitlab.crt:/etc/gitlab/ssl/gitlab.crt \ (1)
    -v ./gitlab.key:/etc/gitlab/ssl/gitlab.key \
    -v ./gitlab.rb:/etc/gitlab/gitlab.rb \ (2)
    -v ./gitlab-data:/var/opt/gitlab \
    -e GITLAB_ROOT_PASSWORD=YourPassword \ (3)
    docker.io/gitlab/gitlab-ce:latest
17349b87f81aa9eb7230f414923cf491c84a36a87d61057f8dc2f8f82c7ea60a| 1 | We pass our new certs via volume mounts to Gitlab |
| 2 | Our previously modified minimal config |
| 3 | Let’s be creative |
This can also be done with the make target pd-gitlab.
|
Once the container is running Gitlab can be reached at following address: https://localhost:10443
Great success, but unfortunately Gitlab alone is only half the deal.
Adding a runner &
Setting up a runner which is able to spawn new containers inside Podman is a bit tricky and requires to build a specially configured container first.
Luckily for us other people struggled with the same idea and did the heavy lifting for us:
$ podman build -t $(RUNNER_IMAGE_NAME) -f runner/Containerfile \ (1)
    --build-arg=GITLAB_URL=$(GITLAB_URL) \ (2)
    --build-arg=REGISTRY_URL=$(REGISTRY_URL) \
--build-arg=PODNAME=$(PODNAME)| 1 | This relies on the pipglr project |
| 2 | This is an excerpt from the provided Makefile, so please consider the env variables properly set |
This can also be done with the make target pd-runner-podman-build.
|
Registration of the runner &
The current registration process requires us to register a new runner inside Gitlab first and this can be done via at: https://localhost:10443/admin/runners
Once submitted the redirection is going to fail, since our host machine doesn’t know the hostname
gitlab:

This can be bypassed by just replacing gitlab with localhost or with a quick edit of the
hosts file:
$ grep 127 /etc/hosts
127.0.0.1     localhost
127.0.0.1     meanas
127.0.0.1     gitlab
Registration of the actual runner is bit a more involved, but remember the other people? pipglr, the actual hero our story, comes prepared and brings some container labels to execute the registration commands.
I took the liberty to throw everything into a Makefile target, and we just call it directly this time:
$ TOKEN=glrt-t1_QnEnk-yx3sdgVT-DYt7i make pd-runner-podman
# This requires Podman >=4.1 (1)
#podman secret exists REGISTRATION_TOKEN && podman secret rm REGISTRATION_TOKEN || true
#podman secret exists config.toml && podman secret rm config.toml || true
Error: no secret with name or id "REGISTRATION_TOKEN": no such secret
Error: no secret with name or id "config.toml": no such secret
1a02dae2a667dbddbdc8bd7b0
Runtime platform                                    arch=amd64 os=linux pid=1 revision=690ce25c version=17.8.3
Running in system-mode.

Created missing unique system ID                    system_id=s_d3cc561989f6
Verifying runner... is valid                        runner=t1_QnEnk-
Runner registered successfully. Feel free to start it, but if it's running already the config should be automatically reloaded!

Configuration (with the authentication token) was saved in "/etc/gitlab-runner/config.toml"
# Fix SSL config to contact Gitlab registry
db86c90b8d202682014668223
pipglr-storage
pipglr-cache
8230fd623fc59d7621600304efcf1a11b5c9bf7cec5a8de5237b6d0143edb809 (2)
| 1 | I really need to update this, meanwhile even my Debian machine uses a decent version of Podman |
| 2 | Yay! |
The output looks promising, so let us verify our containers via Podman:
$ podman ps -a --format 'table {{.ID}} {{.Image}} {{.Status}} {{.Names}}'

CONTAINER ID  IMAGE                                    STATUS                   NAMES
bfac4e6acb26  localhost/podman-pause:5.3.2-1737979078  Up 42 minutes            e91d11fdeb16-infra
cc6599fdf8db  docker.io/gitlab/gitlab-ce:latest        Up 42 minutes (healthy)  gitlab
8230fd623fc5  localhost/custom-pip-runner:latest       Up About a minute        pipglr
And there it is, our new runner in the list of Gitlab:
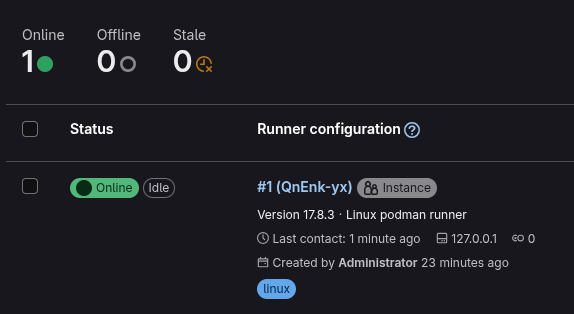
From here everything should be pretty much self-explanatory and there are loads of good articles how to actually use Gitlab itself like:
Bonus: Running with Dagger &
Following the original idea of using Dagger, just another step of preparation is required. Dagger uses another container inside the runner and adds a bit more compexity to the mix:
The containers are nicely stacked, but this requires a specially grafted one for Dagger in order for it to access files:
FROM docker.io/golang:alpine

MAINTAINER Christoph Kappel <christoph@unexist.dev>

RUN apk add podman podman-docker curl fuse-overlayfs \
    && sed -i 's/#mount_program/mount_program/' /etc/containers/storage.conf \ (1)
&& curl -sL --retry 3 https://dl.dagger.io/dagger/install.sh | BIN_DIR=/usr/local/bin sh| 1 | This took me quite a while to figure out |
Bonus: Caching via registry &
With so many containers (1x gitlab + 1x runner + 1x builder) the limit of a free tier can be quicky reached, and it is strongly advised to add some kind of caching layer. Gitlab comes with its own registry and can be used to cache all artifacts locally.
We already did the required configuration in our minimal config, so we just have to push the containers and configure the registry.
$ podman login -u root -p $(GITLAB_PASS) --tls-verify=false https://$(REGISTRY_URL) (1)
$ podman push --tls-verify=false \
$(BUILDER_IMAGE_NAME):latest $(REGISTRY_URL)/root/showcase-dagger-golang/$(BUILDER_IMAGE_NAME):latest| 1 | Perfectly set-up environment for sure! |
And finally this can be done with the make target pd-gitlab-prepare-cache.
|
Conclusion &
Gitlab is by itself a complex system and adding Podman and Dagger to the mix doesn’t make it easer at all, but probably increases the complexy tenfold.
So what do we actually get?
During my experiments with the trio I quickly ran into many problems and some of them were really challenging. Although I tried to address some of them in this blog post, to make it fellow readers easier to gets started, the whole thing is still complicated.
My original goal was to benefit from the facts to have pipeline knowledge everywhere, since the same pipelines are run locally and in the actual CICD and to be freed from the sales stuff of Docker, but if I consider the cost of this small advantage…
Ultimately I made the decision to postpone every move in this direction for now.
All examples can be found next to the examples from the first post: